
Session Replay Explained, How It Works and When You Should Use It
Session replay helps you understand what users experienced by reconstructing their interactions on your site or app, so you can diagnose UX friction and product bugs without guessing from dashboards alone.
- Session replay is not a video recording, it is an event-based reconstruction that works best when paired with errors and network context.
- The highest ROI use cases are targeted: reproducing bugs, finding dead clicks and rage clicks, and pinpointing where forms and funnels break.
- Privacy and performance are not “later” tasks: masking, consent, retention, and sampling should be decided before you capture at scale.
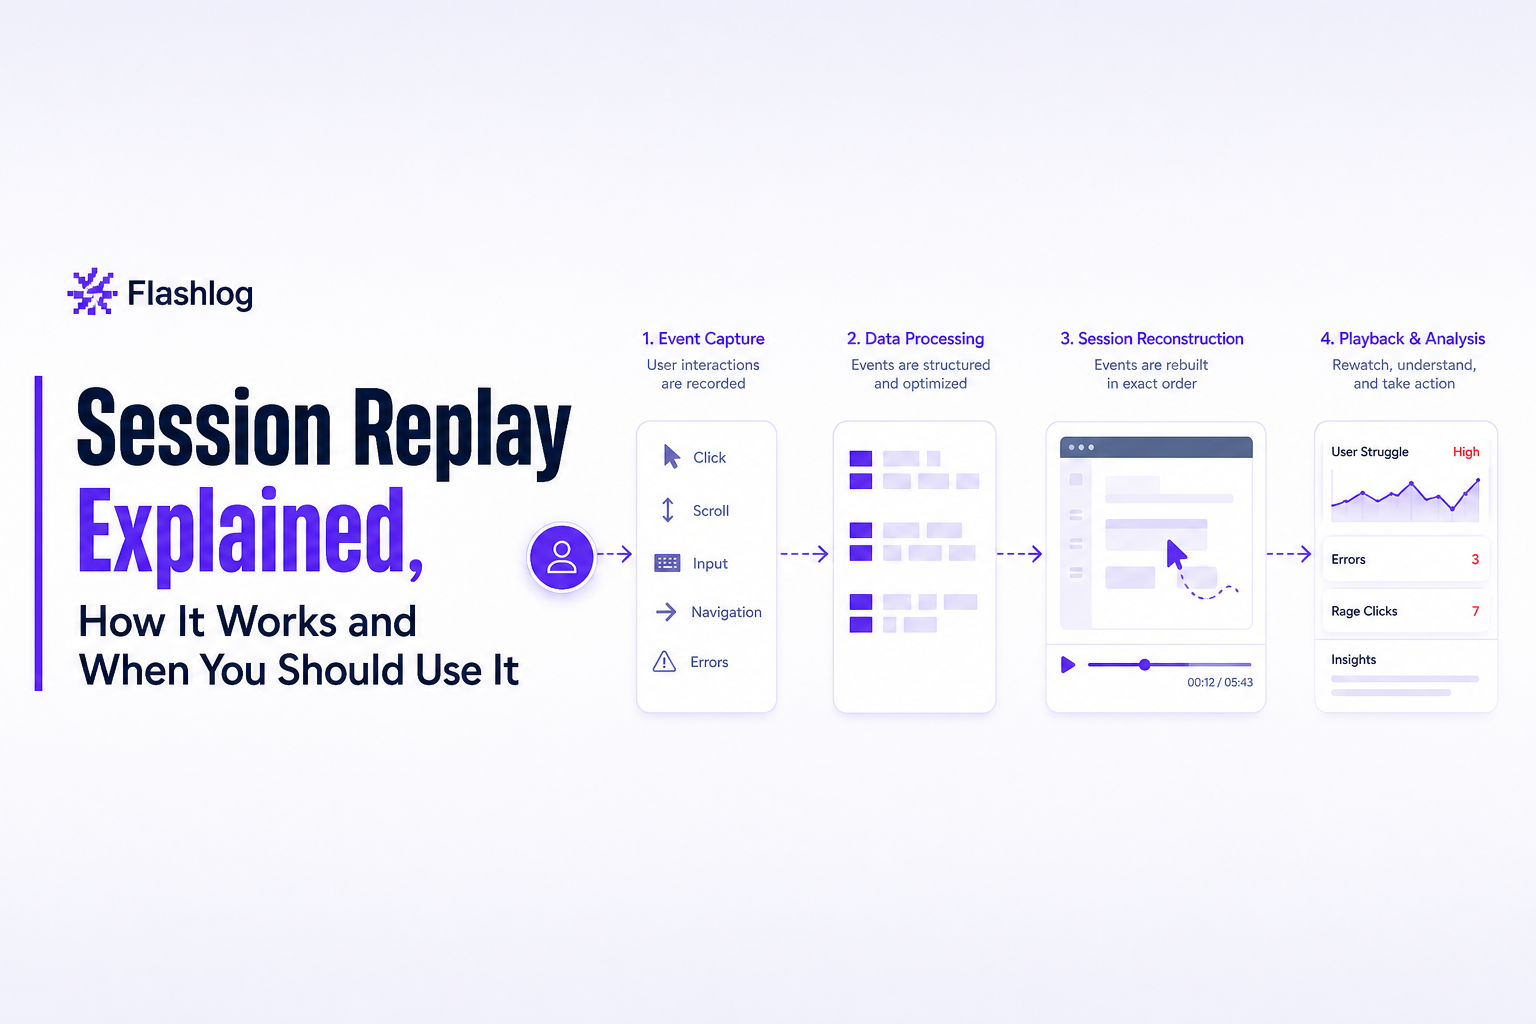
What Session Replay Is and What It Is Not
At its core, session replay reconstructs a user session from captured events (clicks, scrolls, input changes, DOM mutations) so you can “replay” the journey that led to an error, drop-off, or confusing UI moment. The goal is diagnostic context: what the user did, what the UI showed, and what changed right before the problem.
A working definition you can use internally
Definition: Session replay is an instrumentation technique that captures client-side interaction and page state changes as structured events, then reconstructs those events into a timeline you can review to debug UX and product issues.
That definition matters because it separates replay from adjacent tools that are often confused with it.
Session replay vs analytics vs logs vs screen recording
| Tool type | What it captures | Best for | Where it fails |
|---|---|---|---|
| Session replay | Client events + DOM state changes (reconstructed) | Seeing the steps and UI state that led to friction or bugs | Hard to use at scale without sampling, tagging, and privacy controls |
| Product analytics | Aggregated events (e.g., “Clicked CTA”, “Completed checkout”) | Trends, funnels, cohort behavior, A/B impact | Tells you what happened, not how it happened in a specific session |
| Server logs / APM | Requests, errors, traces, timings | Root cause in backend services, performance bottlenecks | Often missing the user actions and UI state that triggered the request |
| Screen recording (video) | Pixel frames (literal recording) | Training, demos, user research with explicit consent | Heavy storage, sensitive by default, limited searchability and correlation |
Common misconceptions to clear up before you buy
- “It records everything.” In practice you choose what to capture, how often (sampling), and how to mask inputs. Capturing “everything” is usually a privacy and cost problem.
- “It replaces reproduction steps.” A replay helps, but engineers still need a crisp summary of steps, environment, and the failing request or error. If you want a template, see reproduction steps.
- “It’s just for UX.” It is equally valuable for debugging: the last meaningful click before a 500, the form submit that triggered a JS exception, the navigation that caused a state mismatch.
How Session Replay Works Under the Hood
Most modern session replay systems do not store a video. They capture a stream of structured events and page changes, then reconstruct the DOM and user interactions in a player. Understanding this helps you evaluate accuracy, performance, and privacy tradeoffs.
The four building blocks of replay
- Initial snapshot: a baseline representation of the DOM and key state when capture starts.
- Incremental updates: DOM mutations, layout changes, and UI updates over time.
- User interaction events: clicks, taps, scroll depth, focus changes, input edits, and navigation.
- Timeline stitching: events are ordered with timestamps, often aligned with errors and network activity.
Why replays can differ from “what the user saw”
Because it is a reconstruction, a replay can diverge from the original experience in edge cases. The most common causes are:
- Dynamic content (ads, embedded widgets, third-party iframes) that cannot be reconstructed reliably.
- Fonts and rendering differences between the user’s environment and the replay sandbox.
- Single-page app state where UI changes depend on in-memory state not fully captured.
When we audited replays for a React checkout flow, the pattern was clear: the most useful sessions were the ones where replay events were automatically aligned to the failing request and the frontend error, not the ones with the “most pixels” captured.
What to look for in the timeline view
To make session replay actionable for debugging, the player should let you answer these questions in under 2 minutes:
- What was the last meaningful user action? Example: “Clicked Confirm order.”
- What changed immediately after? Example: spinner stuck, validation message, route change.
- Did a request fail? Method, endpoint, status, and latency around the moment of failure.
- Is there an error signal? JS exception, console error, unhandled promise rejection.
When Session Replay Delivers the Most Value
Session replay is most valuable when you use it to answer specific diagnostic questions, not as a general “watch users” activity. A practical way to decide is to map a use case to an owner, a trigger, and a measurable outcome.
Use case map: trigger → owner → outcome
| Trigger you detect | Primary owner | What replay should reveal | Success metric |
|---|---|---|---|
| Rage clicks on a button | Product + UX | Dead click area, slow response, confusing label | Rage click rate down; task completion up |
| Form drop-off spikes | Growth + Frontend | Validation loop, masked field issues, mobile keyboard problems | Field-level completion rate up |
| Checkout error rate increases | Engineering + Support | Exact steps + failing request + environment | Time-to-reproduce down; fewer support back-and-forth |
| Feature works on desktop, fails on mobile | QA + Frontend | Viewport-specific UI state, tap target issues | Mobile bug rate down by release |
Concrete examples of what to look for
- Rage clicks: 5 to 10 clicks in the same spot within a few seconds. In replay, confirm whether the UI is unresponsive (no state change) or the click target is misaligned.
- Dead clicks: clicks on elements that look interactive but have no handler. In replay, cross-check whether a transparent overlay or z-index issue blocks the click.
- Form friction: repeated edits to one field, toggling focus between fields, or repeated submit attempts. In replay, note the exact validation message and whether it clears after correction.
Where session replay is a poor fit
- Pure backend failures without a UI symptom: APM and logs will be faster.
- Long-running performance investigations: you will want traces, profiles, and synthetic monitoring first.
- Highly sensitive workflows (health, finance, auth screens) unless masking and capture controls are proven and audited.
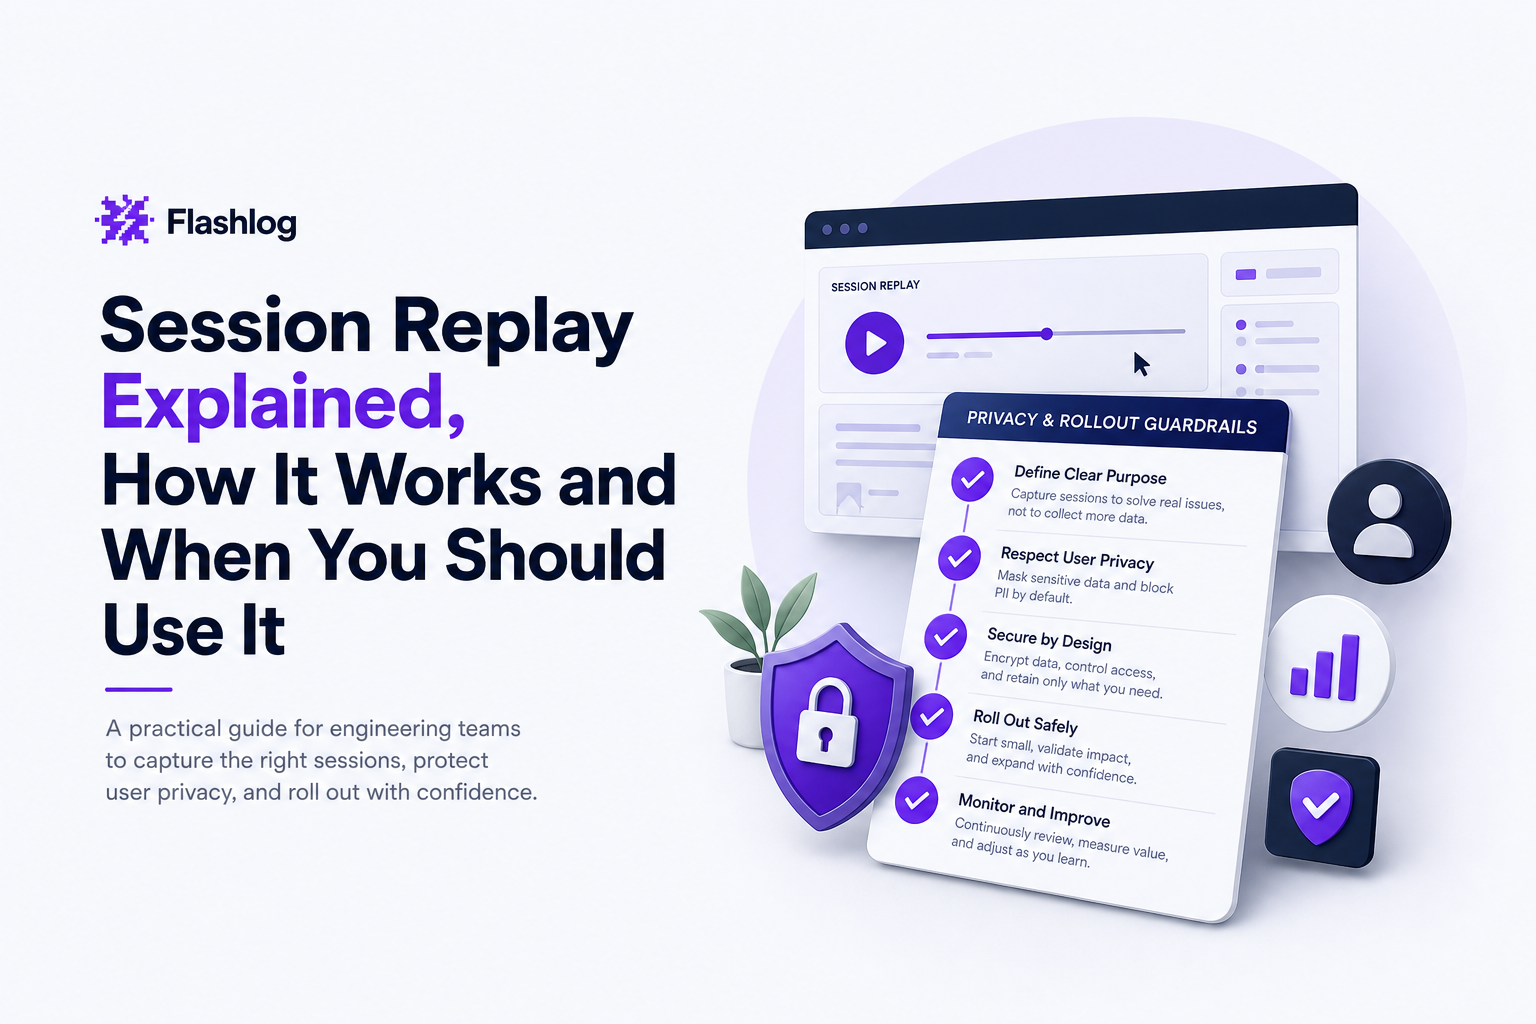
Privacy, Security, and Performance Basics You Must Get Right
Session replay can capture sensitive data if you treat it like “just another analytics script.” The safest approach is to decide what you will never record, what you will mask by default, and how you will prove it stays masked.
A practical privacy guardrail checklist
- Mask by default for inputs: passwords, tokens, card numbers, SSNs, and any free-text fields that could contain PII.
- Blocklist selectors: exclude DOM regions like account settings, billing, inboxes, and support chats.
- Allowlist capture for high-risk pages: only capture specific components that are needed for debugging.
- Retention limits: set a short default (often 7 to 30 days) unless you have a compliance reason to store longer.
- Access controls: restrict replay viewing to roles that need it; log access for audits.
Consent and compliance: decide based on your footprint
Whether you need explicit consent depends on your jurisdiction, data types, and implementation. Use your legal counsel, but operationally you should be prepared to support: consent gating, Do Not Track style preferences where applicable, and deletion requests. For baseline guidance, start with the principles in GDPR resources and your own DPIA process if required.
Performance: how to avoid turning replay into a slowdown
Performance issues usually come from capturing too much, too often. In our experience working with high-traffic SaaS teams, sampling 5% to 20% of sessions plus 100% of sessions that hit defined error triggers kept overhead manageable while preserving the sessions engineers actually needed.
- Start with sampling: capture a small baseline percentage, then increase only if you can prove value.
- Trigger-based capture: always capture sessions with specific signals (500s, JS exceptions, checkout failures).
- Limit high-frequency events: throttle mousemove, scroll, and mutation-heavy components.
- Monitor impact: watch Core Web Vitals and script long tasks after rollout. Reference: Web Vitals.
A Starter Framework to Choose and Roll Out Session Replay
Buying session replay is easy. Making it change how bugs get diagnosed is the hard part. The rollout framework below is designed to produce measurable outcomes in 2 to 4 weeks, not a library of replays no one watches.
Step 1: Define 3 diagnostic questions and the trigger for each
Pick three questions you want replay to answer, and define the trigger that routes a session into review.
- Question: “Why are users failing checkout?” Trigger: POST /checkout returns 500 or payment error code.
- Question: “Where does onboarding stall?” Trigger: user repeats step 2 more than 3 times or exits within 60 seconds.
- Question: “Which UI element is misleading?” Trigger: rage clicks on a specific selector.
Step 2: Set sampling and tagging rules that match your goals
- Baseline sampling: 5% to 10% of all sessions for broad UX discovery.
- High-signal sampling: 100% capture for sessions with defined error triggers.
- Tags you will actually use: release version, feature flag state, plan tier, and key funnel step.
Step 3: Create a triage workflow that prevents “replay theater”
Replays should enter the same workflow as bugs, not a separate “UX inbox.” A lightweight model:
- Detect: error or anomaly triggers create a review queue.
- Summarize: reviewer writes 3 bullets: last actions, expected vs actual, environment.
- Attach evidence: link the replay plus the failing request and any error details.
- Decide: fix now, backlog, or needs more logging.
If you want a time-boxed approach, pair this with an issue triage routine so the team reviews evidence consistently.
Step 4: Define success metrics that match the job to be done
Choose metrics that prove session replay is reducing time and uncertainty, not just increasing visibility.
- Engineering: time-to-reproduce (TTR), percent of bugs with clear steps, reopen rate.
- Support: number of follow-up questions per ticket, time-to-first-response.
- Product/UX: rage click rate on key screens, form completion rate, drop-off at a specific step.
Step 5: Decide what other evidence must travel with the replay
A replay alone often answers “what happened,” but not “why.” The fastest teams bundle replay with technical context: failing request details, environment (browser, OS, viewport), and a short summary that engineers can act on. When we tested pairing session replay with a structured bug context package, we cut the average “can you tell me how to reproduce this?” back-and-forth from multiple messages to a single handoff.
For deeper operational guidance, see debug in production and production debugging workflows.
| Rollout phase | What you configure | What you measure after 2 weeks |
|---|---|---|
| Week 1: Safety first | Masking defaults, blocklists, retention, access control | Zero sensitive fields visible in audits; viewer access logged |
| Week 2: Signal capture | Error triggers, sampling, tags (release, feature flags) | % of high-severity issues with replay attached; TTR trend |
| Week 3 to 4: Workflow | Triage queue, evidence template, tracker integration | Fewer support follow-ups; lower reopen rate |
FAQ
If your goal is not just watching sessions but shipping fixes faster, Flash Log focuses on capturing bugs automatically with the surrounding journey, failing request, environment, and privacy-masked replay context so engineers can reproduce issues without chasing users for details.
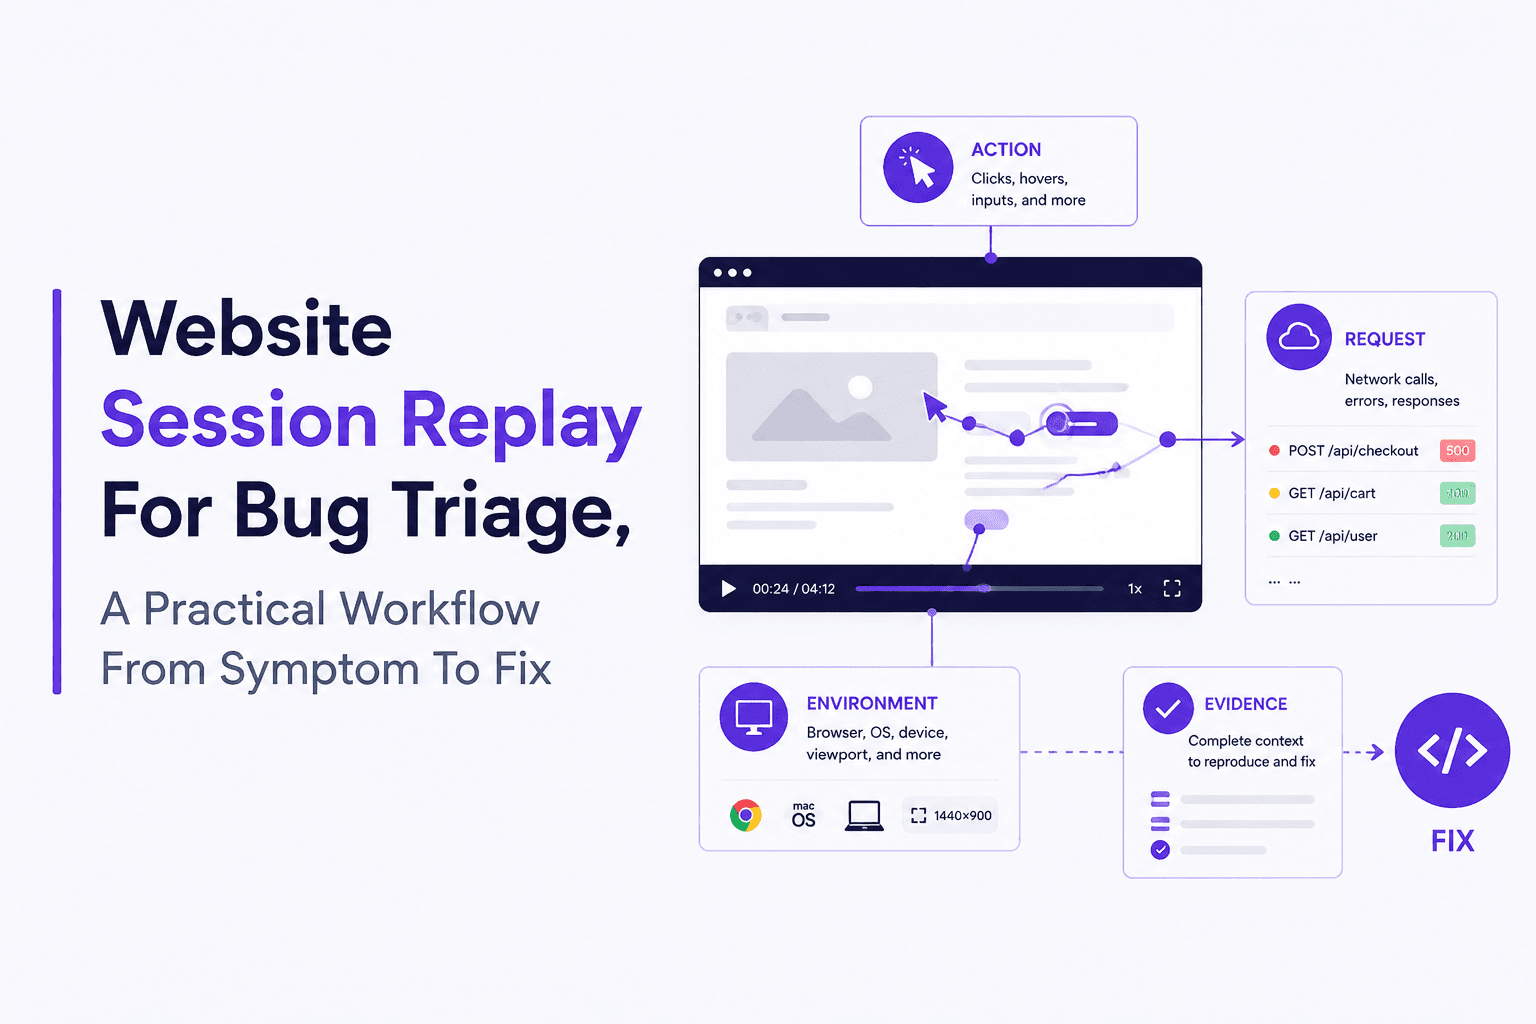
Website Session Replay For Bug Triage, A Practical Workflow From Symptom To Fix
Use website session replay for bug triage: what to capture, a checkout drop-off example, privacy-safe setup, and how to choose replay tools.

Alert Management That Engineers Actually Trust - A Noise-Reduction Blueprint With Templates
A practical alert management blueprint: ingest, normalize, dedupe, suppress, route, and measure alerts with copy-paste templates and KPIs.

Escalation Policy Template And Matrix For On-Call Teams
Use a practical escalation policy template and SEV matrix with timelines, roles, and targets to reduce missed pages and time-to-ack.